This weekend my bestest girlfriend and her daughter came to visit. Although they only live a few hours away life always gets in the way and we don’t get to see each other as often as we’d like. Our daughters are nine months apart so it’s full on girl time when we are together. You might be imagining painting nails, movies, eating, drinking, laughing and pillow fights. The truth isn’t far from that except when you’re my best friend you get conned into being her next skin experiment. So this weekend my bestie helped me perfect the self tanner technique. It’s summer time and although I think you are all beautiful wearing the color of skin that God made you, I do recognize that some of you want that bronze look. So here is my self tanner experience. Step by Step.
Step 1: Pick a tanner. So I ask people all the time which sunless tanner they are using, either because I think it looks fake and want to advise against it or because I think it looks natural and I want to recommend it. My favorites are the Jergens, Jane Iredale and Tanwise. I picked the Tanwise for this weekends festivities because it doesn’t stink. You can get it at Sally’s from $6.99-$12.99. I tried the dark bronzing sunless mousse, wash-off bronzing mousse in light and the shimmer perfection cream.
Step 2: Wash your body, exfoliate your body, dry your body…… I skipped all of this. I hate exfoliating your skin with scrubs/beads/washcloths etc. Plus I had already showered that day and who wants two showers in one day? I went against the directions is what I’m saying.
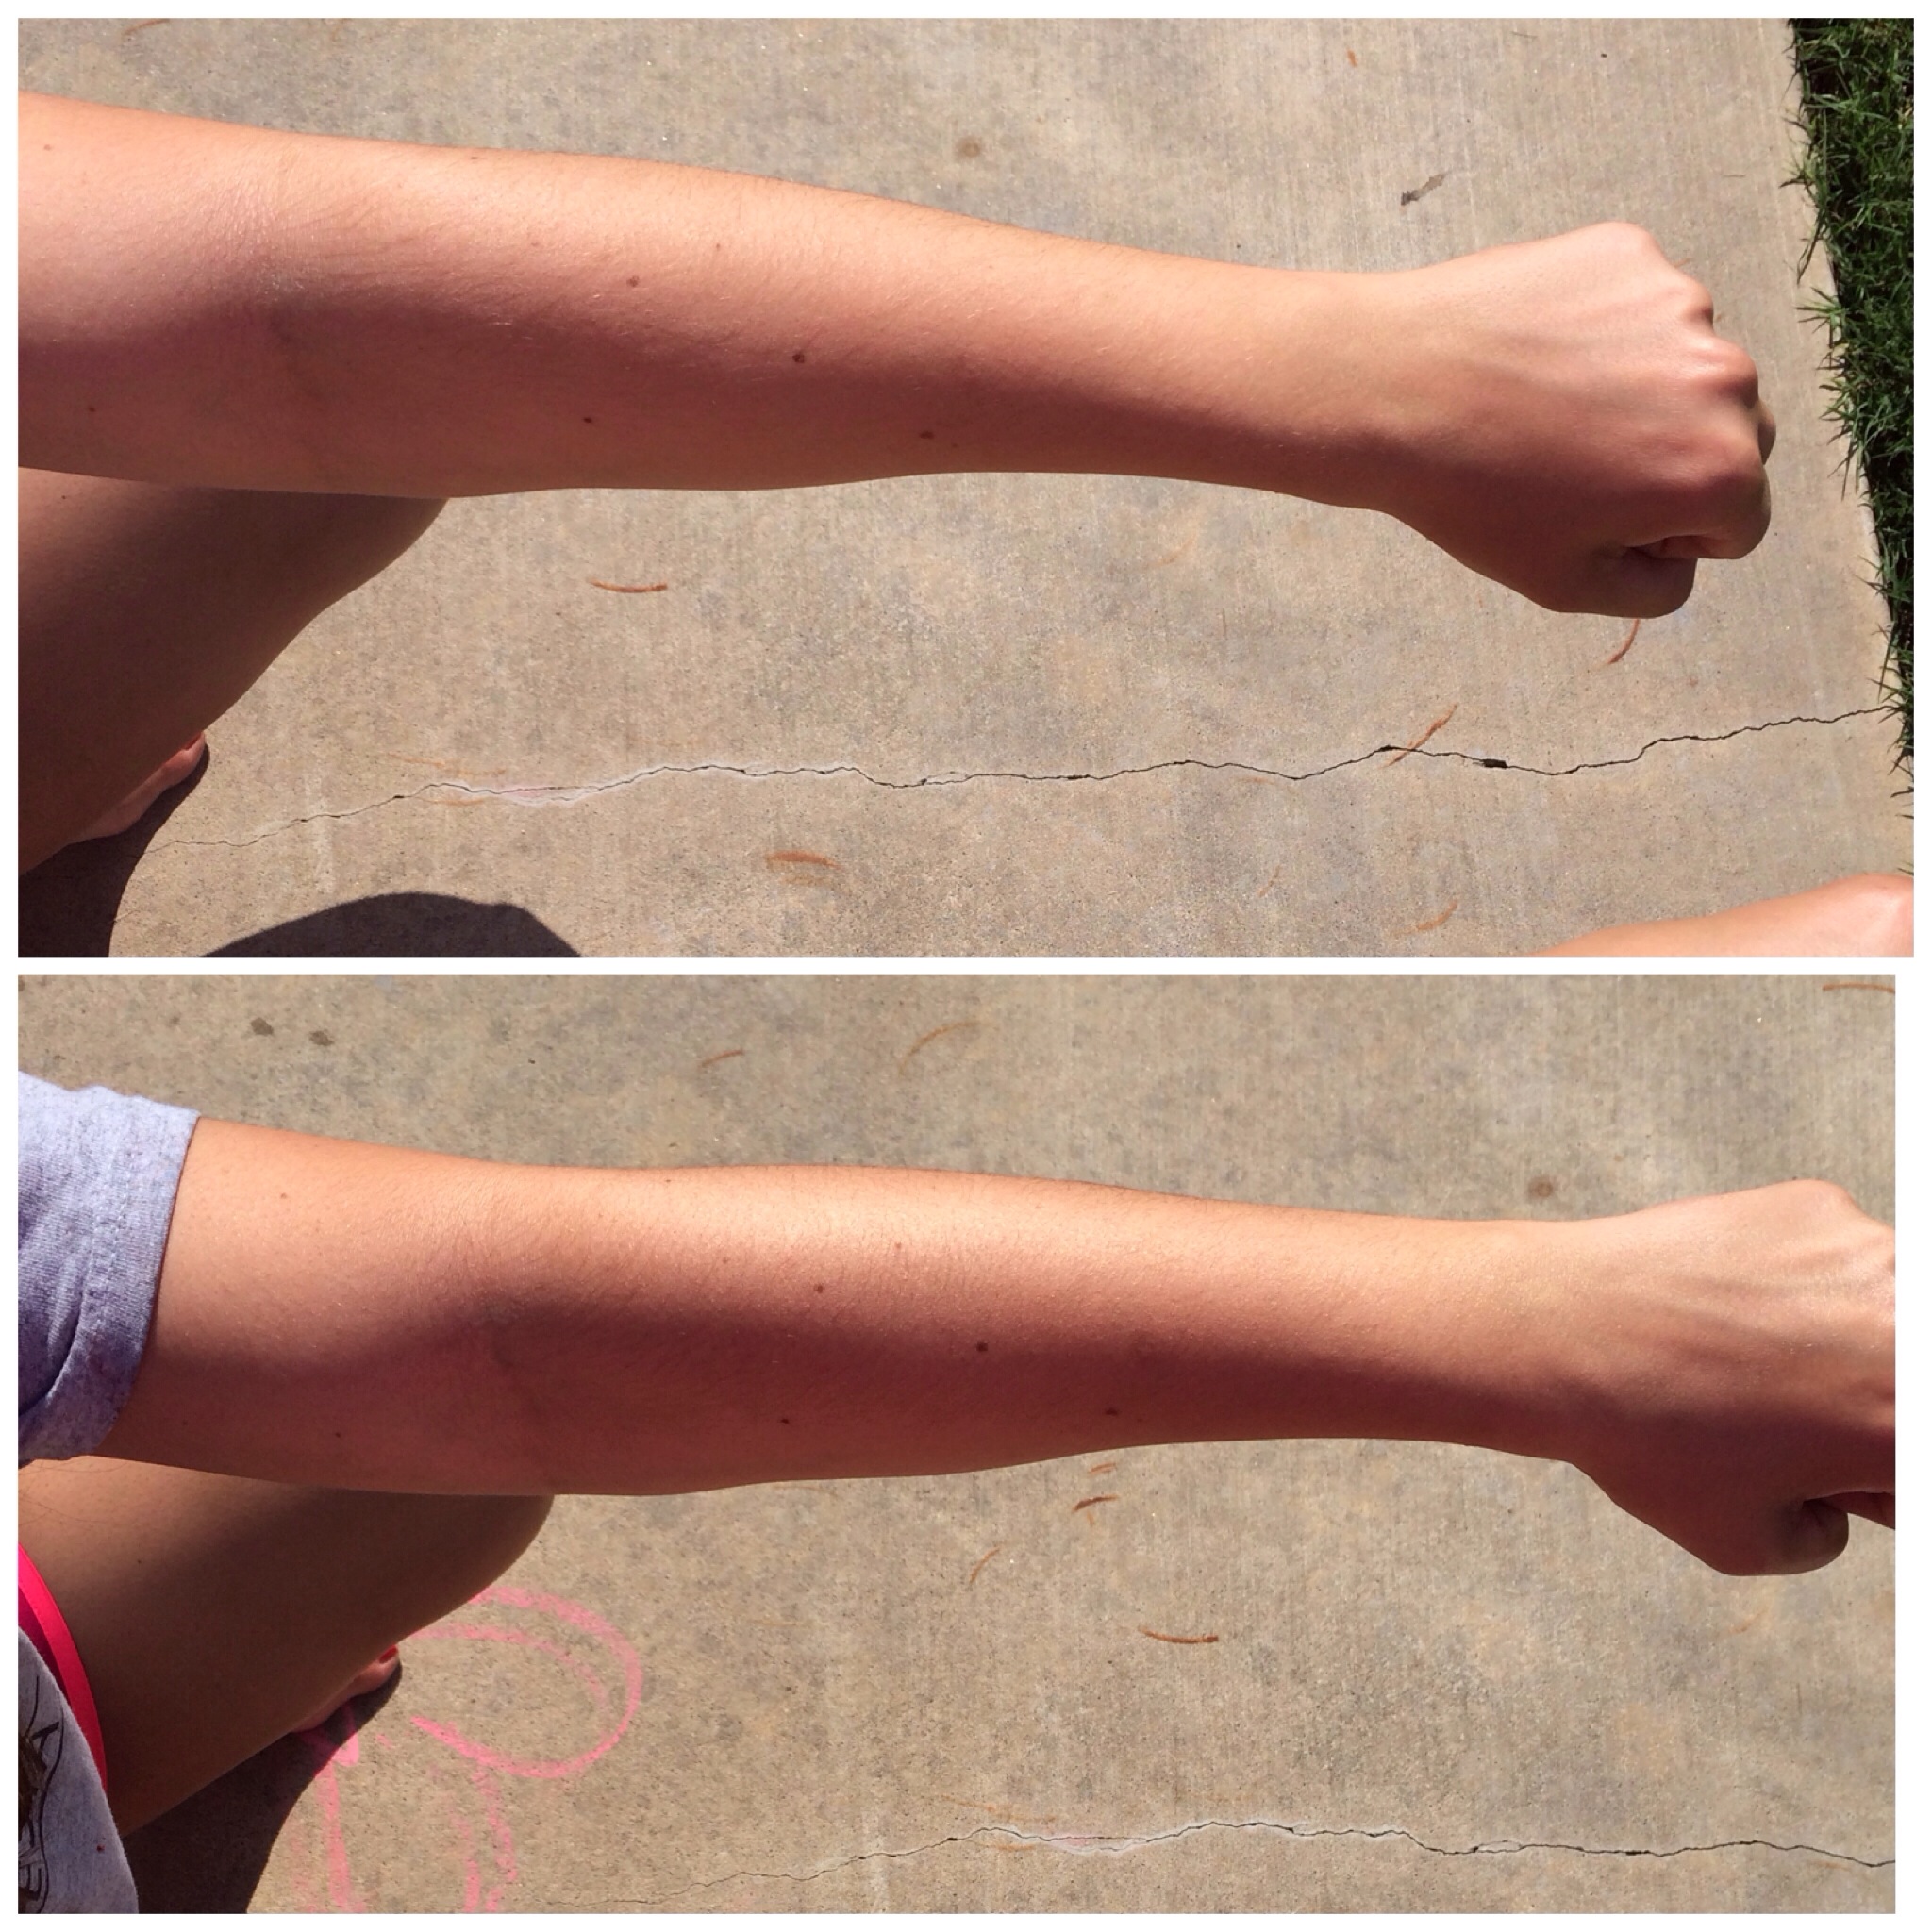
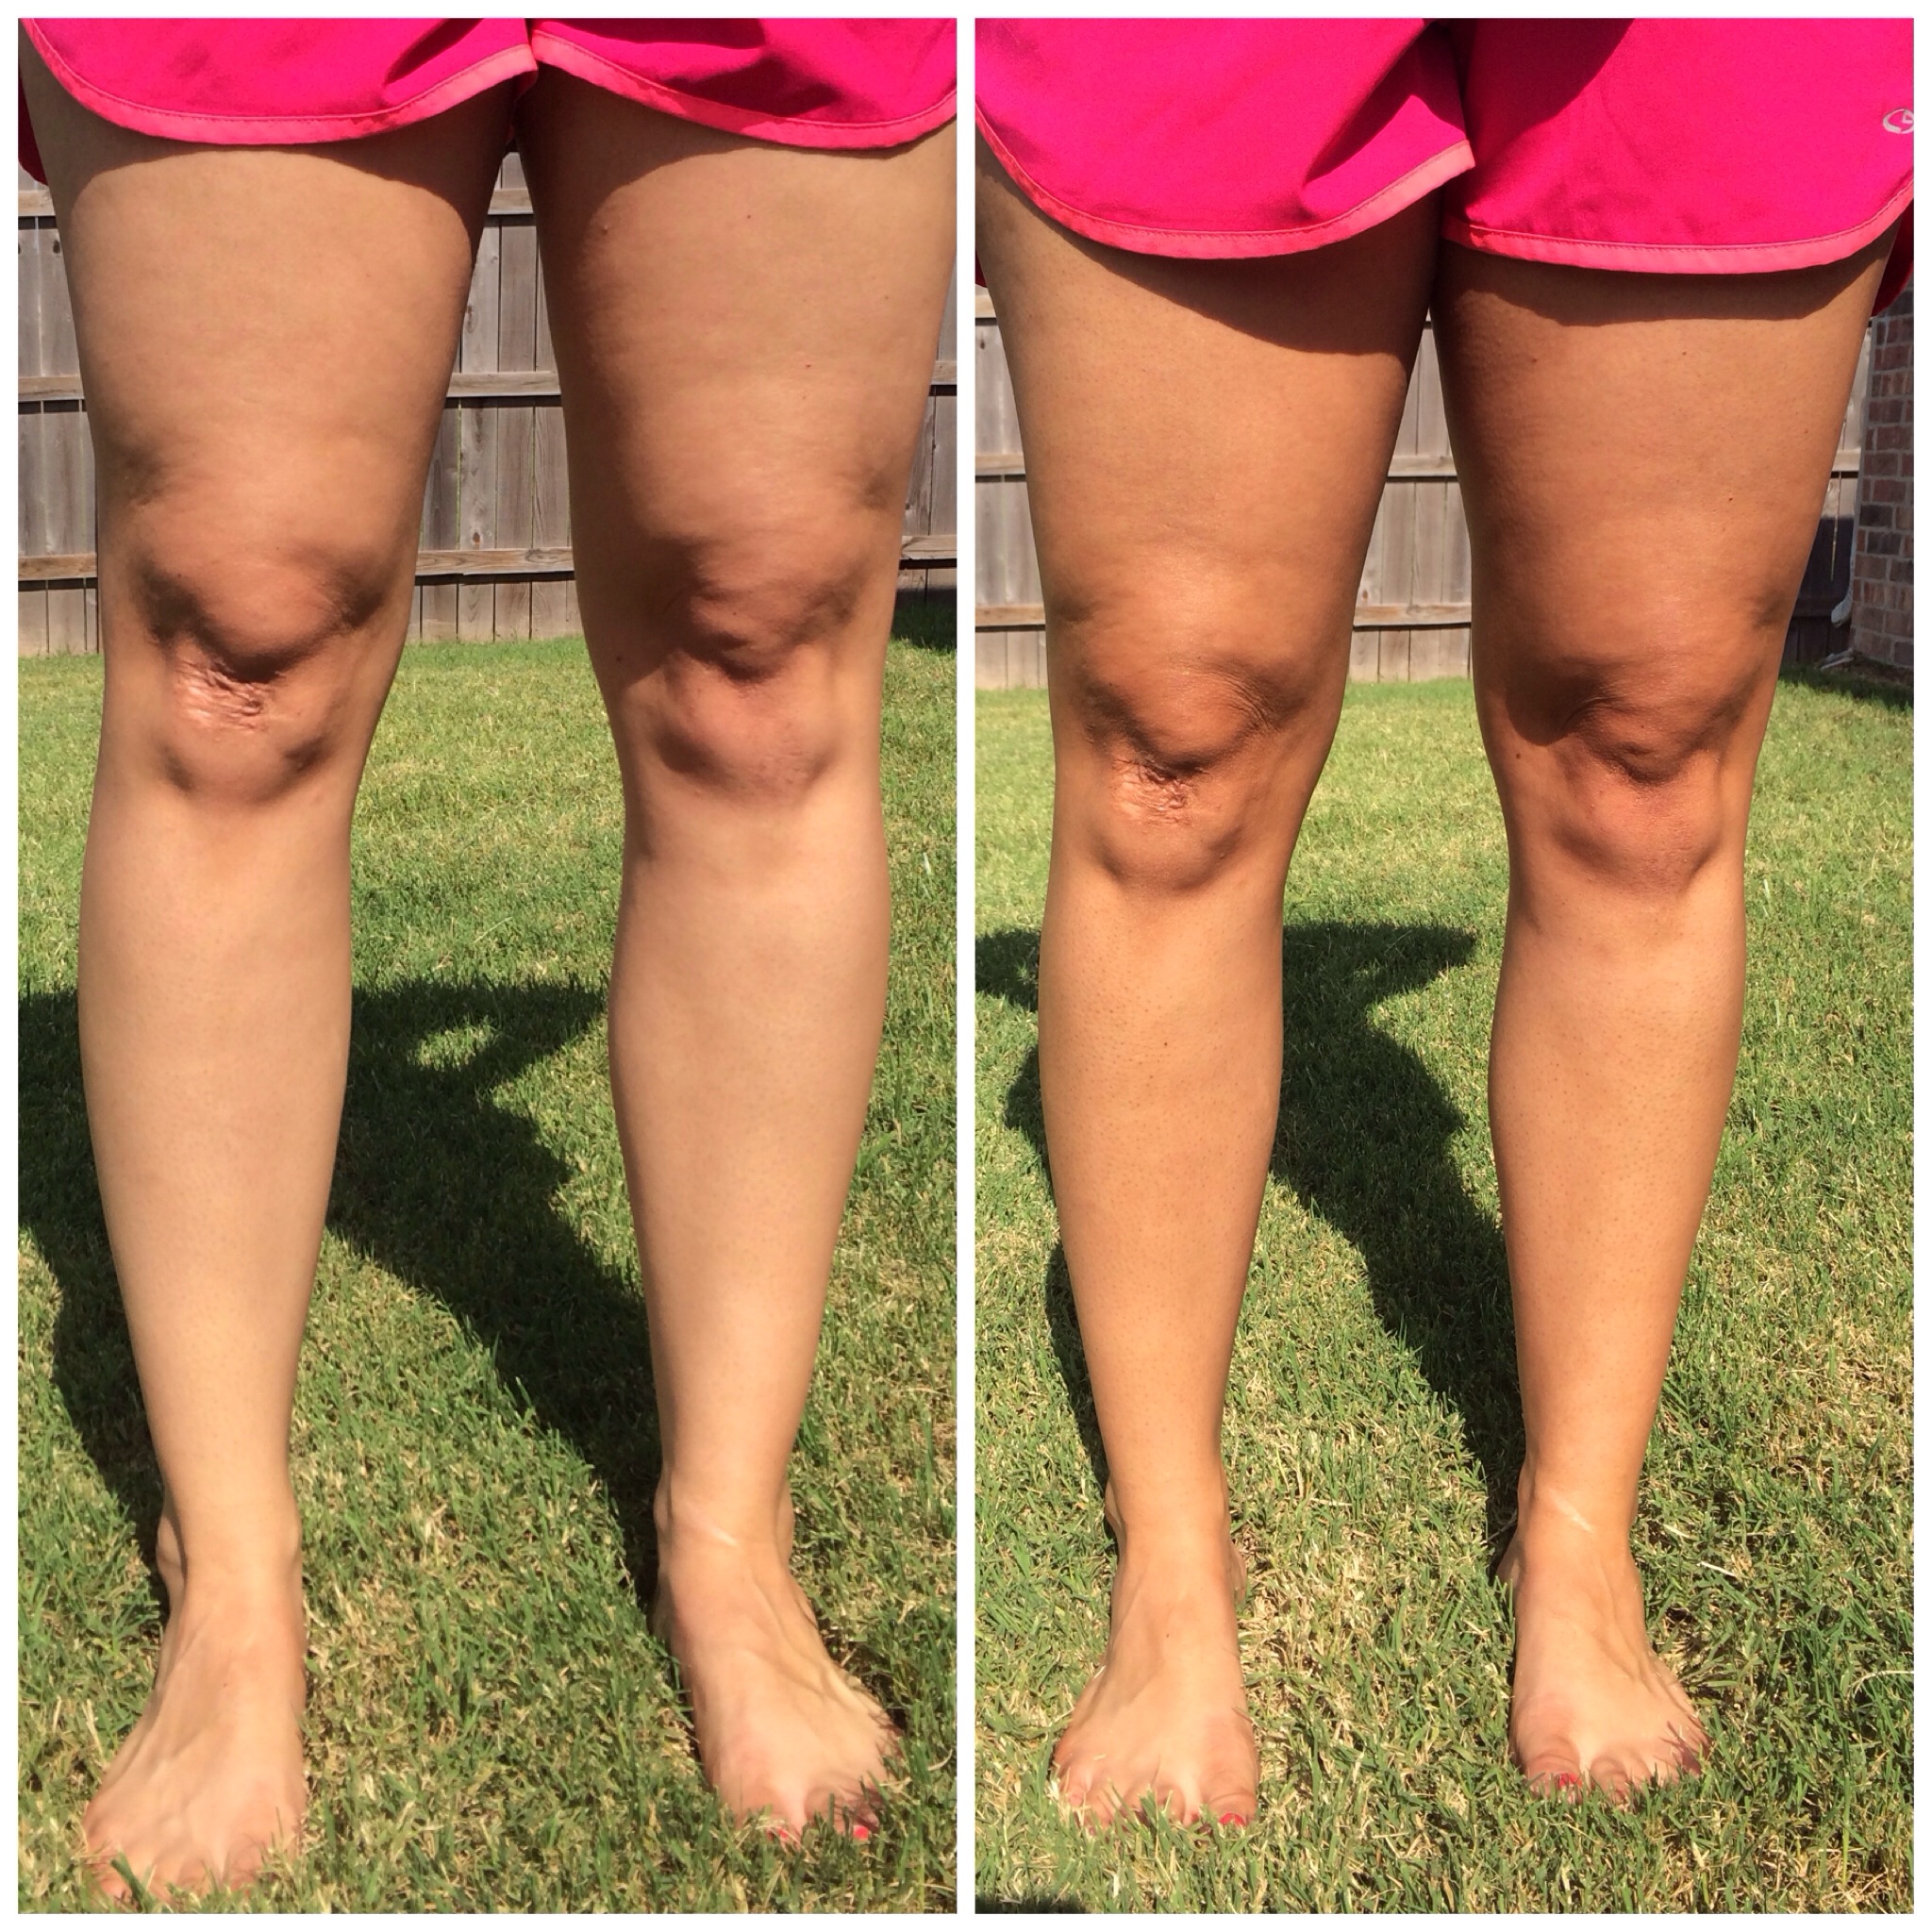
Step 3: Apply self tanner. Okay so this is the scary step right? What if I get too much, not enough and oh lordy please not the dreaded streaky, concentrated around the joints look. You want what looks natural, not an “I just fell in my mop bucket of orange glo” look. So apply in small circles. Small circles continuously until even prevents streaks. I like the mouse because the consistency is easier to spread on your skin. Apply to calves and thighs then spread that onto the ankles and knees for a faded look. So don’t put any directly onto your knees and elbows. I diluted around my knees and elbows with a little plain moisturizer to avoid concentrating it at the elbows and knees. This is a good trick.
Step 4: Allow to dry. This is where you should have something to do planned that doesn’t involve sitting on anything or getting dressed. My BFF and I just stood there talking and laughing. Just know that until that stuff is dry, dry, dry you can spread the bronze look. I wiped hair out of my little girls eyes and put a brown streak across her forehead. This resulted in me frantically washing her face and it turned out fine but that could of been bad.
Step 5: Enjoy your bronze look. On a regular basis I skip all other steps and enjoy my natural color of skin. Don’t forget you always have that option available and it’s free.
Step 6: Optional-Wash it off. I used the dark bronzing and the wash-off. The wash off washed right off and the dark bronzing washed off some too because I didn’t let it set on me for the required 4-6 hours. Even going against directions I still have somewhat of a darker look though. I also tried the Tanwise tan remover but it has a bunch of beads in it and I don’t see that it worked any better than regular dove soap so I would pass next time and keep my $6.99.
Step 7: Use sun precautions. Don’t be fooled by myths lurking in our communities. You still need to seek shade, avoid the sunniest parts of the day, wear sunprotective clothing and wear your sunscreen. You aren’t safe from the harm UV rays can cause your skin.

Overall the experience wasn’t as complicated and scary as I anticipated. I was pleasantly surprised. I still won’t make it a routine. My BFF and I are pretty olive toned to begin with so I am sure you could get varied results with varied skin tones. That’s a good reason to start with the wash off. Hope this post motivates some of you to take the leap to stop sun bathing and getting in tanning beds and trade it for a sunless tanner or your natural color. Good Luck!
If the music is good then dance, Nina